Another benefit of an SSL/TLS reverse proxy is a single source for management of your externally facing SSL/TLS sites. High-availability can optionally be addressed by running two layer two adjacent NGINX instances with something like keepalived (software that allows two boxes to share an IP via gratuitous ARP).
The first decision to make is what form of authentication best protects your network without adding undue burden for your users. For organizations that issue devices to users, or rely on a bring-your-own-device (BYOD) paradigm, client-certificate based authentication is a powerful option. By generating your own internally trusted Certificate Authority, any device which presents a certificate signed by that authority is transparently authenticated to the proxy, and thus relayed to your application. Any device without such a trusted certificate is stopped at the border. Digital Certificates are much more secure than passwords, and because they rely on challenge-response, the private key is never transmitted off of your machine in the way that a password is sent to the server for hashing.
The second decision that needs to be made is whether your requirements require HTTPS end-to-end, or whether you will simply terminate the HTTPS connection at the proxy and allow the proxy to relay over HTTP. For all but the smallest operations, re-encryption is the better option. It allows for more secure direct access for clients internal to your network, and protects against bad actors who are already running arbitrary code inside your datacenter and attempting to escalate privilege. While you will be configuring your own CA for issuing client-certificates, you will still want your external access endpoints to be protected via a publicly signed and trusted CA such as GeoTrust or RapidSSL.
Setting up client-certificate based authentication is easy, although it can seem intimidating at first.
This how-to assumes that you are starting with a fully up-to-date instance of Ubuntu 18.04 LTS.
shell
Apt-get-update && apt-get upgrade
You might be prompted to reboot after running these updates.
Next, install nginx (openssl is installed by default
shell
Apt-get install nginx
Now, we’ll create our client-certificate signing CA. Let’s create a directory at the root file system to perform this work.
shell
cd /
mkdir CertificateAuthCA
chown $myuser:www-data /CertificateAuthCA
chmod 770 /CertificateAuthCA
This set of permissions will grant the user $myuser (replace with the username of your own privileged user used to setup the box) and the www-data group (the context in which nginx runs by default). It will grant everyone else no permission to the sensitive file that is your root signing key.
shell
cd /CertificateAuthCA
shell
## You will be prompted to set a passphrase. Make sure to set it to something you’ll remember.
openssl genrsa -des3 -out myca.key 4096
## Makes the signing CA valid for 10 years. Change as requirements dictate.
## You will be asked to fill in attributes for your CA.
openssl req -new -x509 -days 3650 -key myca.key -out myca.crt
Creating a client keypair. (This will be performed once for EACH user). It can easily be scripted as part of a user provisioning process.
shell
## You will be prompted for a passphrase which will be distributed to your user with the certificate. Do NOT ever distribute the passphrase set above for your root CA’s private key. Make sure you understand this distinction!
openssl genrsa -des3 -out testuser.key 2048
openssl req -new -key testuser.key -out testuser.csr
shell
## Sign with our certificate-signing CA
## This certificate will be valid for one year. Change as per your requirements.
## You can increment the serial if you have to reissue the CERT
openssl x509 -req -days 365 -in testuser.csr -CA myca.crt -CAkey myca.key -set_serial 01 -out testuser.crt
shell
## For Windows clients, the key material can be combined into a single PFX. You will be prompted for the passphrase you set above.
openssl pkcs12 -export -out testuser.pfx -inkey testuser.key -in testuser.crt -certfile myca.crt
This includes the public portion of your CA’s key to allows Windows to trust your internally signed CA.
Finally, we’ll create the nginx configuration file to serve a site for our authenticated reverse proxy.
Navigate to your nginx directory, and make a new directory for your site certificates (The ones you want to be publicly signed by a CA such as from SSLTrust)
shell
Mkdir /etc/nginx/certificates
Chown -R www-data:www-data /etc/nginx/certificates
Chmod 700 /etc/nginx/certificates
Cd /etc/nginx/certificates
## Generate an RSA Private Key (You will be prompted to set a passphrase and fill out attributes)
openssl genrsa -out ~/domain.com.key 2048
## Use it to create a CSR to send us
openssl req -new -sha256 -key ./domain.com.key -out ./domain.com.csr
remove the passphrase from your key: (you will be prompted for the passphrase generated above)
shell
openssl rsa -in key.pem -out key.pem.nopass
Navigate to your nginx sites available directory
shell
Cd /etc/nginx/sites-available
And create a new configuration file
shell
Touch proxy.conf
Populate proxy.conf with the following configuration directives ( you will need to configure with your trust certificate from a CA or SSLTrust ):
text
server {
    listen        443;
    ssl on;
    server_name myserver.com;
    proxy_ssl_server_name on;
    ssl_certificate      /etc/nginx/certificates/cert.crt; ## Use your own trusted certificate from CA/SSLTrust
    ssl_certificate_key /etc/nginx/certificates/cert.key; ## Use your own trusted certificate from CA/SSLTrust
    ssl_client_certificate /etc/nginx/certificates/myCA.pem; ## Use your own trusted certificate from CA/SSLTrust

    ssl_verify_client on;

    ## You can optionally capture the error code and redirect it to a custom page
    ## error_page 495 496 497 https://someerrorpage.yourdomain.com;

    ssl_prefer_server_ciphers on;
    ssl_protocols TLSv1.1 TLSv1.2;
    ssl_ciphers 'ECDHE-RSA-AES128-GCM-SHA256:ECDHE-ECDSA-AES128-GCM-SHA256:ECDHE-RSA-AES256-GCM-SHA384:ECDHE-ECDSA-AES256-GCM-SHA384:kEDH+AESGCM:ECDHE-RSA-AES128-SHA256:ECDHE-ECDSA-AES128-SHA256:ECDHE-RSA-AES128-SHA:ECDHE-ECDSA-AES128-SHA:ECDHE-RSA-AES256-SHA384:ECDHE-ECDSA-AES256-SHA384:ECDHE-RSA-AES256-SHA:ECDHE-ECDSA-AES256-SHA:DHE-RSA-AES128-SHA256:DHE-RSA-AES128-SHA:DHE-RSA-AES256-SHA256:DHE-DSS-AES256-SHA:AES128-GCM-SHA256:AES256-GCM-SHA384:ECDHE-RSA-RC4-SHA:ECDHE-ECDSA-RC4-SHA:RC4-SHA:HIGH:!aNULL:!eNULL:!EXPORT:!DES:!3DES:!MD5:!PSK';

    keepalive_timeout 10;
    ssl_session_timeout 5m;

location / {
    proxy_set_header X-Forwarded-For $proxy_add_x_forwarded_for;
    proxy_set_header Host $http_host;
    proxy_redirect off;
    proxy_set_header X-Forwarded-Proto https;
    proxy_pass http://mysite;
    // optionally you may want to look into the proxy_pass_reverse directive as well.
  }
}
Create a symlink to enable your site in nginx:
shell
Ln -s /etc/nginx/sites-available/proxy.conf /etc/nginx/sites-enabled/proxy.conf
Lastly, restart nginx:
shell
Systemctl nginx restart
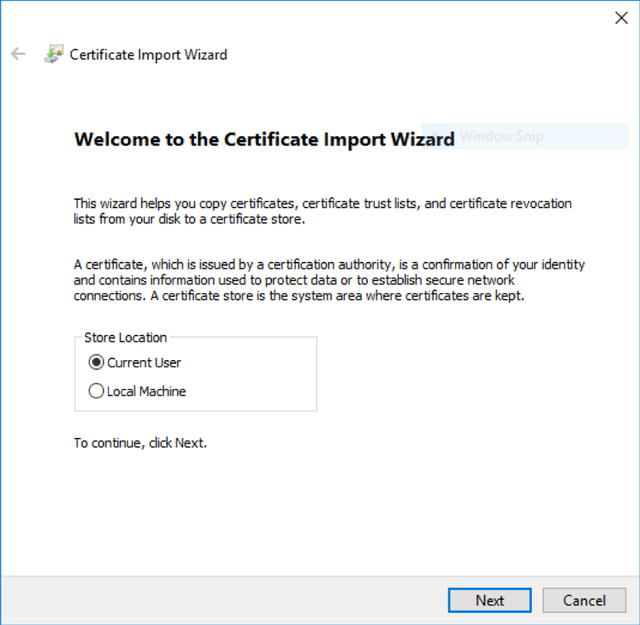
Importing the Client Certificate onto a Windows Machine
Double click the .PFX file, select “Current User”.

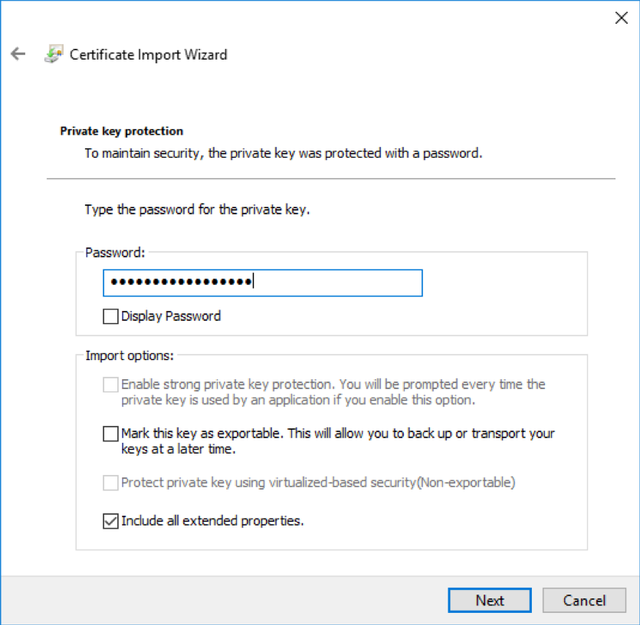
If you set a passphrase on the PFX above, enter it here. Otherwise, leave blank and hit next.
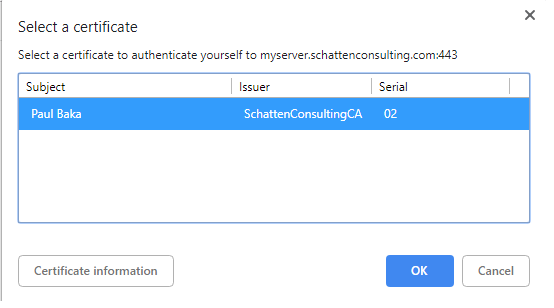
Next, add the site in question to “trusted sites” in Internet Explorer. This will allow the client certificate to be sent to the site for veritifcation. (Trusting it in Internet Explorer will trust it in chrome as well).
When you next visit the site, you should be prompted to select a client certificate. Select “OK” and you’re in!
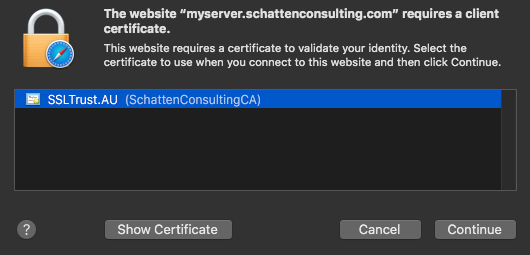
Importing the Client Certificate into a OSX
After you generate your client certificate and have it on your OSX machine, double click it.
You will be asked to enter your OSX User password. And any passphrase you set on the certificate.
When you next visit the site, you should be prompted to select a client certificate. Click “Continue” and you can than access the site. You may also be prompted to enter your OSX User password.
Discussions and Comments
Click here to view and join in on any discussions and comments on this article.